Any photographer can make beautiful images during golden hour, and occasionally, we get lucky at a venue with thoughtful and lovely lighting. But what really sets excellent photographers apart is the ability to make beautiful images when ambient conditions seem intent on thwarting us.
Build a Beautiful Business.
So what can you do when you find yourself in the latter situation?
First, don’t panic, and don’t catastrophize. Even if you only brought your camera and no other gear, you have everything you need to make great images. You have options, and only a couple of them require OCF (off-camera flash).
Before we get into the scenarios, here are some universal techniques and best practices to incorporate into every low-light situation:
- You’ll never be in a pitch-black room, and that means you’ll have one or more light sources to use.
- Invest in AT LEAST one prime lens. Zoom lenses are extremely versatile, but even the most extravagant ones have maximum apertures of f/2.8, which don’t let in as much light as the cheapest nifty fifty.
- Don’t be afraid to push your ISO. Modern mirrorless cameras perform adequately well into the 16,000 ISO range, and some even higher. A noisy photo is ALWAYS better than no photo.
- While it’s great to be a natural light photographer, you will likely gain huge versatility by utilizing off-camera flash.
- Weddings tend to prioritize successful photography, so feel free to ask the venue to brighten the lights if you think it will help. Nobody’s gonna be mad.
- While it’s tempting to compensate for low light with a slow shutter, try to keep it at or faster than 1/100. A little slower with wider lenses and a little faster with longer lenses.
- At slower shutter speeds, shoot using the viewfinder. Pressing the camera against your face will provide an additional point of stabilization that you won’t have when using the LCD screen.
- ALWAYS ALWAYS ALWAYS shoot in raw format. These uncompressed files have tons of details hiding in the shadows that can be recovered during post-processing.
Okay, let’s jump in.
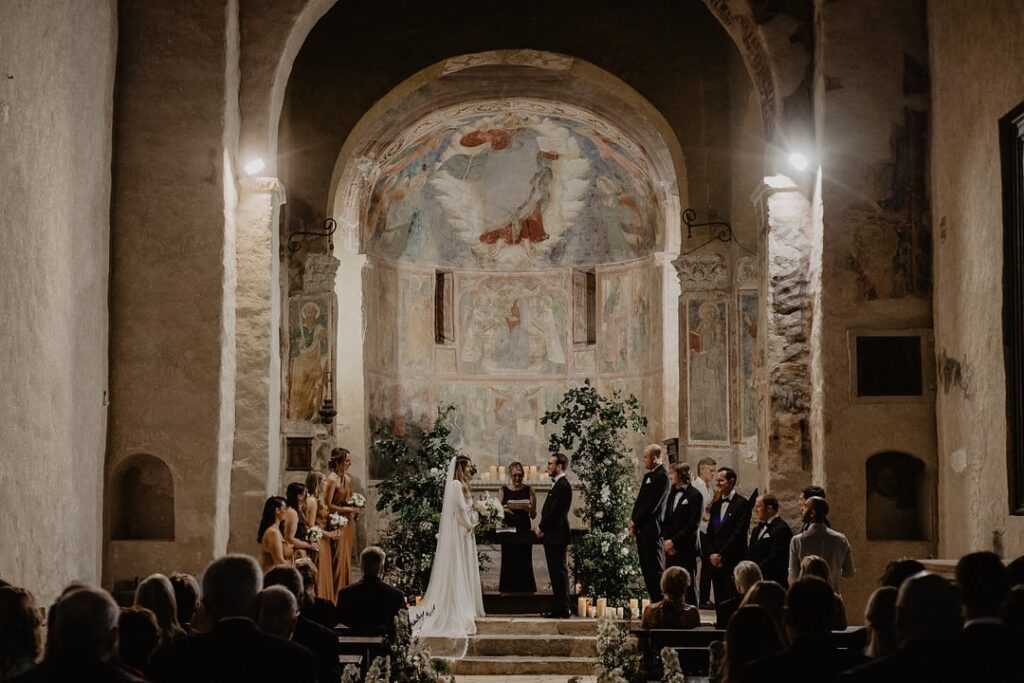
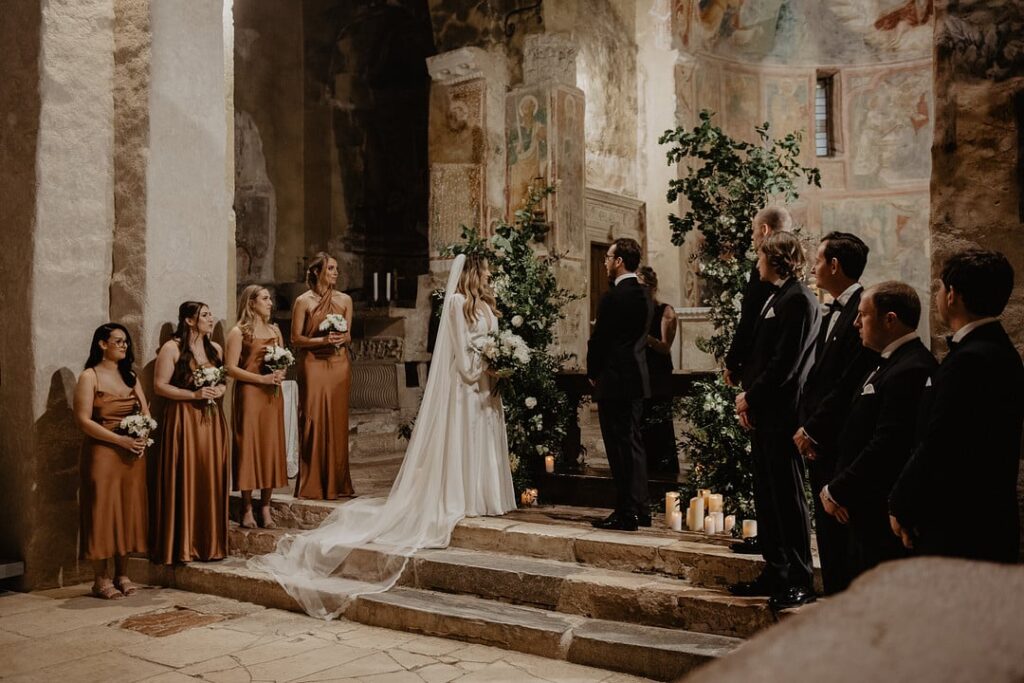
Scenario 1: Indoor ceremony with no windows; string lights, exposed Edison bulbs, or candles are the only light source.
Main challenge: These light sources create a beautiful ambiance, but they need more light to create a proper exposure. Additionally, your subjects will be moving, at least during the beginning and end of the ceremony, which will require a somewhat faster shutter speed to capture the action.

Ambient Solution
Settings and Gear
- Shutter: no slower than 1/125; 1/200 is better
- Aperture: 1.8 or wider
- ISO: the lowest you can manage to maintain a slightly dark exposure and 1/125 shutter or faster. It’ll probably be at least 1600 ISO, but go up to 10,000 if needed.
- White Balance: Try the tungsten setting first. It doesn’t matter THAT much as long as it’s consistent. Just don’t do auto. You can fix one and sync them all later in the Lightroom.
- Lens: Your fastest, longest prime (fast = f/1.2 through f/1.8; long = 85mm or longer). If you only have a 50mm f/1.8, use that and just get closer to the action.
- Tripod (optional): I hate using tripods for non-studio work, but using one here eliminates blur due to camera shake, and it will allow you to have a shutter speed as low as 1/15 during the stand-still parts of the ceremony. I don’t recommend it for the processional or recessional because of its inherently stationary nature.
- Option camera setting: set your camera’s playback color to black and white. In this scenario, you’re more interested in getting the exposure right than the colors. This will help you simplify the calculation in your head by extracting the irrelevant data.
For any given challenging scenario, I like to solve the most complex part first. In this case, we need to overcome low light without using a slow shutter because both you and your subjects will be moving. Moving subjects plus slow shutter equals blurry subjects.
So we’re going to use our fastest lens—my choice would be my 85mm f/1.8 or my 50mm f/1.4—set to the widest aperture along with a high ISO. From here, it’s just a matter of trial and error to find the lowest possible ISO that yields a slightly dark exposure. Take your ISO as high as you need to. I said this earlier, but it bears repeating:
A noisy photo is better than no photo. If you take nothing else away from this article, remember this one thing.
One important note: longer focal lengths require faster shutter speeds to account for increasingly exacerbated camera movement.
If you only have an f/2.8 or slower lens, add the following techniques:
- Increase your ISO even more.
- Slow your shutter a little more and compensate by
- Sitting down
- Squeeze your right tricep or shoulder with your left hand to create a steady surface, and shoot with the camera resting on your left bicep (most useful with a longer focal length lens).
Flash Solution
I don’t recommend it in this scenario because I think it will negatively affect the vibe. But if you decide to go for it, use off-camera flash ONLY, and start with the power as low as it will go. You just want to fill the dark areas, so make sure you aren’t overpowering the ambient light. If you have them, put orange gels on the flashes to match the ambient color.
Scenario 2: A nighttime fall or winter wedding with no available daylight for portraits.
Main challenge: By the time the couple is ready for portraits—together and with the bridal party—all daylight is gone. But despite the dark and the cold, they would like to take photos outside.
Ambient Solution
Settings and Gear
- Tripod: One of the few times I think having a tripod at a wedding is a lifesaver. It’ll allow you to shoot at super slow shutter speeds to harness the limited ambient light. It’s also one of the few times when neither you nor the subjects are moving around.
- LED panel light (optional): Either on a stand or held by an assistant
- Shutter: 1/20ish with tripod; 1/80ish without
- Aperture: One or two people, f/1.8ish. I Groups, f/4.5ish (tripod likely required)
- ISO: as high as you need
- WB: auto
This is kind of a worst-case scenario, and while I don’t recommend trying to tackle it without off-camera flash if you have to, you have to. Try to use street or building lights. Get creative and use a car’s headlights. Just remember to look at the shape the lights are making on faces; streetlights tend to be directly overhead, which is unflattering at best.
Flash Solution
Settings and Gear
- One flash on a stand with an umbrella, beauty dish, or similar modifier. Angle it somewhere between 45° and 90° from your subjects. Use the lowest power that will both expose your subjects and not overpower the ambient light.
- If you’re feeling ambitious, use another flash as a low-powered rim light to provide additional dimension.
- Exposure settings are impossible to identify here. Your priorities are to 1. Properly expose your subjects, 2. Keep your subjects in focus, and 3. Expose the background, even if just a little.
Get clients. Get paid. Get happy.
This is BY FAR the better solution because you won’t have to rely on potentially unflattering or nonexistent ambient light. It does, however, require a bit more practice to get right.
If you have an assistant or second shooter with you, let them schlep the light. If you don’t, consider enlisting a guest you’ve made friends with to help you schlep. Or do it yourself and ask a bridesmaid or groomsman to hold your camera (they love missions).
Creating amazing studio-quality light on location is a whole course in itself, so I won’t go into those nuances here, but there are tons of tutorials online to get you started.
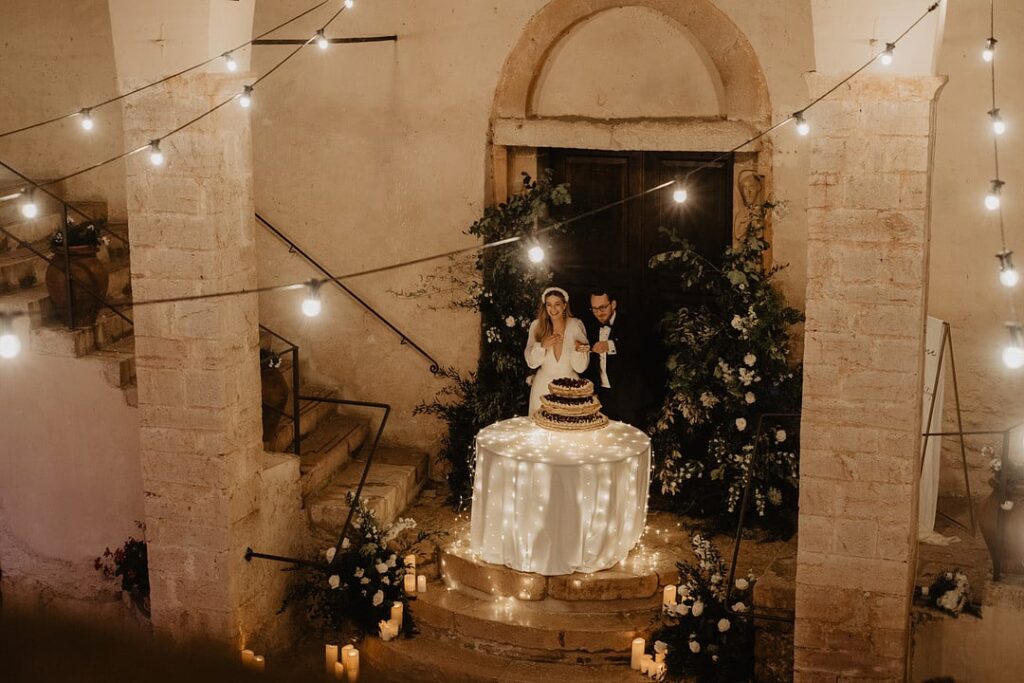
What I WILL say, though, is DO NOT MISS AN OPPORTUNITY TO SHOOT IN THE RAIN OR SNOW. Put a bare flash (no modifier) directly behind your subject on its lowest power and (if possible) one with a modifier in front at 45°. The rear light will illuminate every single droplet or snowflake to create a mesmerizing twinkle. If you only have one available light, just do the one behind.
Scenario 3: The venue turns off all the lights on the dancefloor, so the only light source comes from the DJ’s party lights.
Main Challenge: A fairly common thing to encounter at weddings is that the DJ’s light is inconsistent and constantly in motion. It changes colors and intensity and leaves it impossible to predict bright spots on otherwise dark faces.
Ambient Solution
The settings in this scenario are less important than the technique. You’ll still need to dial in an acceptable exposure, so start at 1/160ish and 4,000 ISO with a wide-open aperture. Use Auto WB.
I have found that using a DJ’s light as the key light (the main light source illuminating the front of the subject) is too inconsistent and oversaturated to expose photos reliably. So, instead, I exclusively use it as a backlight. I shoot toward the DJ booth, letting those weird-ass lights do the hard work of creating a dynamic rim or hair light on the dancing guests. This way, the exposure stays about the same.
And while I know this is the “ambient” solution, most photographers can at least muster an on-camera flash. Assuming that includes you, you can point the speedlight straight up, pull out the attached bounce card, and start with it on low power. It won’t be amazingly dynamic, but it should provide you with just enough fill light to pull in detail from the otherwise dark faces.

If you’re having trouble with autofocus, don’t be afraid to ask the venue’s coordinator to turn up the lights a tiny bit. That will allow your AF to function properly without crushing the rave vibe.
Important note: Experienced DJs don’t use high-powered lasers, and if they do, the lasers are pointed away from the dancefloor. But in the unlikely event the lasers are pointed at people, DO NOT aim your camera at them. The focused beams will damage your camera’s sensor, resulting in the need for a costly repair. Better yet, politely ask the DJ to turn off the lasers or point them at the ceiling.
Flash Solution
I mentioned the one-flash option above, but it’s not my favorite.
My favorite option is THREE off-camera flashes spaced in a loose Y-pattern around the dance floor.
This is a high-skill, high-reward option because it requires lots of practice and lots of tinkering to get right. You need to have adequate light coverage throughout the dance floor, which means adjusting the power of one or more of the lights quickly and frequently. That means you need to have those lights in different groups (A, B, and C), and you need to know which light corresponds to which group at all times.
You’ll ALSO want to have an ON-camera flash as part of the system to fill in super-dark shadows.
You’ll ALSO want to avoid washing out ALL the shadows by shooting directly in line with one of the flashes.
I know it sounds really complicated. True, it takes a lot of practice to get it dialed in and firing on muscle memory, but it doesn’t have to be perfect immediately. You’ll start seeing incredible results the very first you try it. From there, it’s just incremental improvement as you develop your own style.
While I can’t possibly account for every low-light situation in this article, you can pick and choose from these techniques and settings for any of your brutally NOT photo-centric lighting challenges.
Start your free trial with ShootProof
Not every single photo you make needs to be the best photo you’ve ever made. Sometimes, it’s perfectly acceptable to make a photo that’s…perfectly acceptable. Just make the best of what you’re given, and remember, a noisy photo is always better than no photo at all.
Written by Mike Stempler | Photographs by Emanuele Guadagno
Contributor